Monday, March 22, 2010

For Sale by Owner

The 3yr project is now complete and we are ready to sell!!
(click on pictures to maximize view)


For Sale by Appointment call 601-291-6915


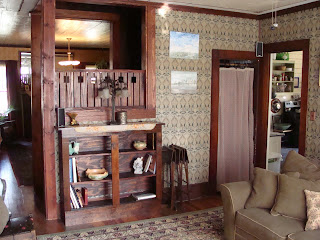
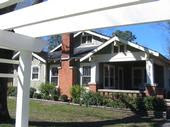
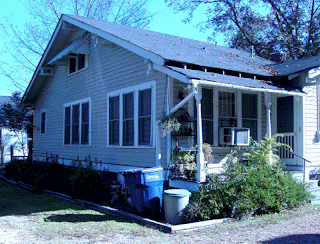
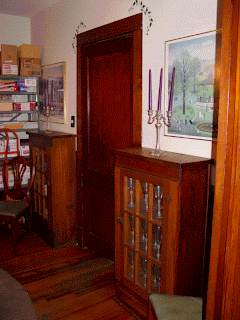
Newly restored 1928 bungalow individually listed on the National Register of Historic Places. High amount of integrity in this charming 3 bedroom family home. Lots of natural light, with all original woodwork and period appropriate fixtures. Large fenced in yard for children and pets, and within walking distance to parks and the historic Canton square. Within Local Historic district with State tax credits available.


Approx 1800 sq ft living space


Updated Plumbing, updated Electrical, original Heart Pine floors, Slate Kitchen floor, Stained Glass Windows, Laundry area, and more. A must see!!

14x17 Master Bedroom with walk in closet
15x15 Formal Sitting room
15x20 Den/ living room
11x16 Formal Dining room
16x13 updated Kitchen *(Appliances available)
11x8 Bathroom w/ Ceramic Tile & Claw Foot tub
13x15 second Bedroom
11x17 third Bedroom
Three Fireplaces
Extensive Garden
Original Wood Windows newly restored


Asking $123,000


Canton Public School district
Property Taxes Approx. $450/year with homestead exemption
Lot size 75x210
.25 miles from Police and Fire Department
Gas heat
Wood Siding
Asphalt Roof
Wood, Ceramic, Slate floors
Wood/Wallpaper interior walls
Solid Wood Interior/Exterior Doors
Stained Glass Windows in bathroom and kitchen
CMU Utilities, services water, electrical, gas, sewer, trash (all one bill)
Frigidaire Kitchen appliances *(Glass Top Stove, Dishwasher, and Side by Side Refrigerator all within 4 years of age with warranties) available for purchase with home

This property falls within the boundaries of the local historic preservation district which governs all exterior changes with exception of paint color and general maintenance. All work to the exterior of every home within the boundaries is subject to approval by the Canton Preservation Commission before work will be permitted by the city building department. This insures that historic fabric will remain within the boundaries of the district and assist in the rise in property value as well as maintain the integrity and aesthetics of its historical neighborhood.


Friday, November 13, 2009

Weatherized

Click Here!

Well its that time of year ago, the leaves are falling and the utility bills are rising. I see more and more about energy efficiency and how to beat the crunch of rising utility costs and wonder where this is all coming from. Is from the conscientious earth gaurdians that warn us of global warming and polar cap melting, or our own desire to save as much money possible during an economic downturn. Regardless of the cause, the effect is long overdue. But as an old building lover, I may have a somewhat different view from the typical HGTV ad.
You may have already read my rant about why you shouldn't replace your windows, but lets consider other energy alternatives. Now that you don't feel the need to get rid of the most character driving sources of your home, lets see what else we can do to help out the globe, and save a little cash at the same time.
Of course most ideas are best when fresh, but often times they do not come with the cash flow and timing to make it conducive to instant gratification. Not so if you think outside the box when it comes to this next project. You ready?... Water containment System. Whether its to obtain, contain, retain, or reuse, its all the same simple principle: find a water source, divert, and hold till desired.
We made our water system out of already available materials, and use it primarily for garden watering during the hot summer months. Our cost? Free, but that's because we were very frugal. But anyone can make one of these systems for very little by just looking around.
In the part of the country our little bungalow is in, "rainwater systems", otherwise known as gutters and downspouts, are not extremely popular. Due to raised foundations and the usual lack of very wet seasons, they are really not a necessity. Fortunately for us, our bungalow now has one, which is the base for our collection system. The other half of the equation is the holding tank(s). For this we obtained (2) 55 gallon drums from our local freecycle chapter. ( not familiar with freecycle?, Google it...very cool)
Building the system is as easy as could be, seeing how the collector( the downspout) is already in place. Next all we have to do is set up the holding tanks. We got a little creative and built a framing system so that we could lie 2 tanks on their side and hold up to 110 gallons on reserve, but 1 tank works just as easy, and in an area like central Mississippi, its hard to gather more than 55 gallons at a time any how. You will want to set the holding tank next to the downspout and cut a hole in the top for the downspout to go in to. You will also want to cut the downspout to a length of about 3 inches longer then where the top of the container will reach, so that the downspout goes completely in to the container.When connecting the holding tank to the downspout, an air tight system is obviously not mandatory, but a good seal with silicone around the connecting area of the downspout and the container will help keep away debris and most importantly mosquito's. Keep in mind that this will be a holding tank for water that will become stagnant, which is the perfect breeding ground for the little pests. Our system is equipped with a "hose bib" or spicket that we already had, but one can be purchased at any hardware store. Most recycled barrels will come with an attatched sealed lid, which is highly recommended, not only for the mosquito delema, but also because that type barrel will have a threaded spout hole already in place, which works very nicely when building your system with a horizontal orientation. Thread your hose bib into the barrel, either through the threaded spout hole or through a new hole you make with a standard spade bit. When making a new whole you will need to use a washer on the inside of the barrel to keep the bib in place and this is another great location for some of that silicone caulk we mentioned earlier.
Connect the hose up and you are done!! Most of the water will run through utilizing the pressure from the contained water, and though it is not a gusher by any stretch, it will make a good source for watering garden plants, filing up animal bowls, or even rinsing of your hands and tools after a fun day in the yard. All to save a little off the water bill, and most importantly, give you a reason to one up that pesky neighbor the next time he starts bragging about the new hybrid he bought to save mother earth.

Click Here!

R.H.S. Medal Winning Plantsman From
Cambridgeshire Reveals A Easy, Simple Way
To Turn Your Gardening Hobby Into A Part
Time Income Of £500 to £1000 Per Week

Best Of All, You Get To Play With Your Plants A Few Hours A Day Giving
You A Perfect Lifestyle Business

Click Here!

Tuesday, January 27, 2009

Is It Spring yet??

The plans are drawn, the boundaries are set, and we have over 1000 seeds waiting to be sown. .. Time for some outside beautification!!
After what seemed to be a long winter (and I know it is still not over), we are looking forward to heading outside. Julie has been looking to get her garden going since we moved in, and I have to say that the bug has hit me as well. I have never been an avid gardener, but there is something about the planning aspect that I really enjoy.
We have, with the help of some great friends, come up with a plan that will encompass most of the rear yard by enlarging the beds that we have already started. In my usually OCD standards, I have drafted up a scaled plan of the backyard as well as a spread sheet of the seeds and plants we have along with some that we plan to get from friends in the neighborhood. I have quickly learned that plants are not as expensive when you have friends and neighbors that know about gardening. Traditionally I have always set off to the local DIY stores to gather what ever I could afford, and while this works fairly well you end up spending way more on plants that may or may not live. With the "divide and conquer" method, you not only get healthy mature plants that you know will grow in your region, but the mother plants get some growing room. Every one wins!!
The seeds we have purchased (about $30 for the whole lot of over 1000) came from a seller on ebay, a venture I may take up in the future. Though this type of purchasing is a lot less expensive, you also have a potential for a lot less plants. For the money it is still a wise investment given you do your homework throughout the process. I would also advice checking the internet for ways to save money on planting ideas. For instance I have found a site that shows how to make seed pots out of newspaper. Not only does this save tons of cash (about $7 per 40 seeds) but it is extremely environmentally friendly. Another trick is to check at your local co-op for free mulch and compost. We will be setting up a compost pile with our garden plan, but for now, we will be relying on top soil mixed with free compost from friends.

Thursday, September 25, 2008

Another one saved!!


Good news!! The Young House has been nominated for an individual listing on the National Register of Historic Places. Not only is it an honor to be put on this list, but we are also able to get tax incentives for all the work we have done!!!

I almost feel guilty about getting out of some state taxes (don't tell Uncle Sam). The work that we have done has merely been a labor of love, but the thought of getting 25% of all the money we have spent on materials back is unreal!
I have, as usual, been working too much to be able to share my stories with everyone.
I apologize...however, this time it is not entirely my fault. A new project has arisen.

Tuesday, June 10, 2008

Wallpaper, Wallpaper, Wallpaper


Figured I would start off this blog by going into the trials and tribulations of wallpapering the old fashion way. I explained a little last blog about the way a homes interior walls would have historically been treated,and with this post I wanted to show some pictures and go into some of the different things that we were surprised with along the way.

Note:The first couple pictures are of the room before we moved in, see if you can match the views up with the new (hint we found a fireplace under the sheetrock!). You will also see the opening of the staircase that is mentioned later.

After we had decided to rip down all the drywall put in late last century, we started in the room that we wanted to finish the most. At the heart of the house, the den was the room that we spent most of our time reading, watching tv or just sitting around talking about the days events. The plan was to make it warm and cozy, period appropriate but not to "museum like", and most of all ours! The current decorating was not exactly our style and the direction we wanted to go in would reflect our personalities but also show something that could have actually been seen in the 1920's.

History lesson
Let me first say that the typical 1920's house in Central Mississippi would have been a bit out of trend with the rest of the country, as has been seen throughout most of history in the south. You see, the southern states not only fell a little behind in the times, but by choice most Southerners hate change. Now don't get me wrong, and please refrain from hate mail, I am not at all bashing the southern way of life! I am simply stating facts here! Most Southerners know what they like and need a little time to get use to something before they go all out and change it, Thats not something bad, just different from Northerners or East/West coasters.
Keeping this in mind we went with a wallpaper that had a bit of an English Arts and Crafts feel with a little bit of Art Nouveau.

Getting Dirty
Tearing the drywall was the cheap, and fun part of the project. Demo is always a good time, but make sure you have the proper equipment! Glasses and a dusk mask are a must, I usually don't like to wear gloves (its a machismo thing) but Julie has a good pair of contractor gloves that she got for about $20. You also will need a good pry bar, nail pullers, a flat and possibly Phillips screwdriver and a claw hammer. Depending on the lighting fixtures, wall plates and different aspects of construction, other tools may be needed as well but not usually anything major.
Once the drywall is off you will have to pull the drywall nails. If modern sheetrock was used it may have screws instead, which will slow you down a bit. As I had mentioned in my last post, the drywallers for our house went right over the existing wall finishes, which were a 1960's acoustical tile board and fortunately for us the original owners wallpapers. Most of the old paper we have dated to what seems to be a 1940's redecorating phase by Mrs. Young, however the paper in the kitchen had been doubled and the bottom layer appears to be a simple geometric pattern that we feel is original to the construction date.

Getting Pretty
Once the nails where pulled it was time to make the room pretty again. The look of the bare plank walls with great heart pine patina was very striking in itself, but gave the rooms a log cabin effect that we were not really going for.
The paper itself came from on online supplier as did the hangers canvas. Cost wise, the canvas is a much cheaper application. At about $.30 per square foot with the tacks it saves you not only time but the frustration level over hanging drywall and then mudding, sanding, mudding, sanding, mudding, sanding (you get the point). On top of that wallpapering over canvas is significantly easier because you don't have to worry about air bubbles (for obvious reasons, the canvas doesn't trap air). Depending on the paper you may need to use a liner paper, which will raise the cost a bit (about $.14 per sq.ft.), but will give you a much nicer finish. This will also help keep the corners square.

Starting at a corner tack one side of the canvas to the wall in a straight, vertical line. It is a good idea to leave about an inch extra that can be tucked into the gap in the corner. The tacks should be nailed about every 8 to 10 inches to keep the canvas taught but not wasteful of supplies. Once one side is complete, tack the top in the same manner. The opposite side can then be stretched and tacked in place, followed by the bottom. I have found that a line of tacks down the center of each sheet helps keep the canvas tight when the paper shrinks. The next sheet should be started over the last sheet by overlapping so that there is no exposed wood left. The paper will not stick to the lumbered walls, hence the reason for the hangers canvas in the first place, make sense? It does not matter which direction you go around the room, but I have found (being a right handed person) that starting with the left side makes it easier to pull the canvas tight as you nail.
Once the canvas is up you can paper just as you would any other surface. We have it down pretty well so that Julie can follow me around the room after I get about 2 sheets ahead of her with the canvas. To hang the paper you can either use a regular wallpaper paste that can be bought at most DIY stores, or opt for the authentic "wheat paste" that is available through the same online dealers that supply hangers canvas, tacks and liner papers. We went with the wheat paste, frankly because, as I had mentioned before...we are purists!(I highly suggest using a paste even with prepasted papers.)

To finish the ceiling we decided to forgo the wallpaper and simply paint the lap boards. To dress it up a little we designed a stencil that we have incorporated into different aspects of the homes design. A very simple but catching design I call a "4 square", you see it a lot in mission style furniture, light fixtures, and bronze work of the period.

Finishing Trim

After the paper was up and allowed time to dry thoroughly, we then installed a crown molding that I had decided upon. The usual store bought pre-formed profile molding just wouldn't do for a true craftsman, so we made our own. Now, don't get the idea that I have all sorts of tools (well, actually, I do...but I didn't NEED them), the old school way of any molding project is by fitting different pieces together to get the profile you want. I choose a profile that I found in a 1920's Morgan Home Builders catalog that incorporated three different pieces (a 1x6 cut in half and laid perpendicular to each other and then a piece of cove molding). It looks great stained or painted, and best of all it is the same style as what originally COULD have been in the house!

With the room papered and the trim installed, it really gives quite a different feel. And if we get tired of it, we can easily rip it down and do it again. The paper and hangers canvas will come off in whole panels, unlike paper on sheetrock, which is another great benefit if this method.


Note: with this type of wall construction and finish technique you will see wrinkles in the paper after a few days of steady rain or moisture in the air, don't worry when the sun comes back out, the paper will shrink and smooth back to normal. You may find this disturbing but I call it character!! A steadily conditioned home with ample insulation in the walls may not have this problem... I wouldn't know:).

Thursday, June 5, 2008

Picture Pages, Picture Pages!


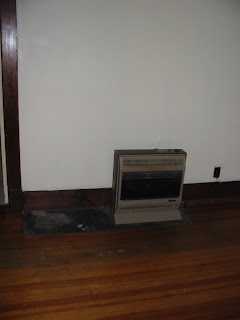
Here are some "start" pictures for you to browse through. Most are of the house just before we bought it, followed by some exciting move in day pics. Please note: None of the furnished room shots here is our stuff!! Eclectic is not our style, as nice as it may be...just wanted to show the "versatility" a space can have with different decorating. I will try to show before and afters side by side as I go through the posts, but these are a good starting point. Enjoy